Hi Snow,
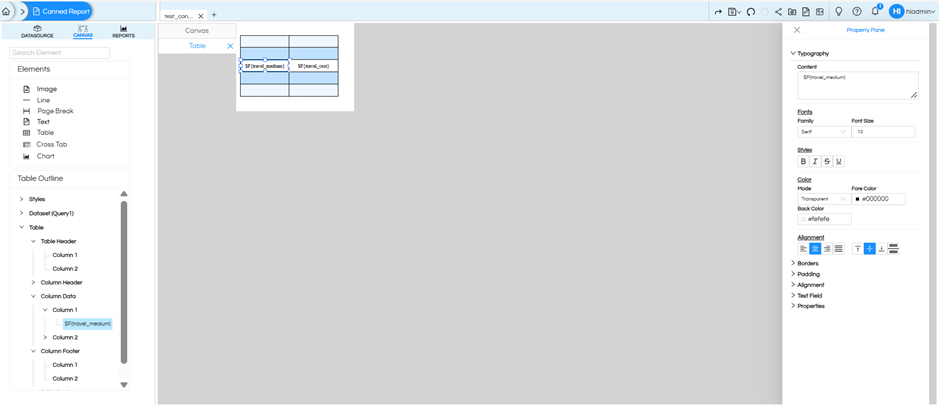
You can apply value-based conditional formatting by creating a custom style, defining a conditional expression, and then applying that style to the required table or crosstab cell.
Steps
1. Open the Table Outline and create a new Style
In the Table Outline, right-click Styles and select Create Style.
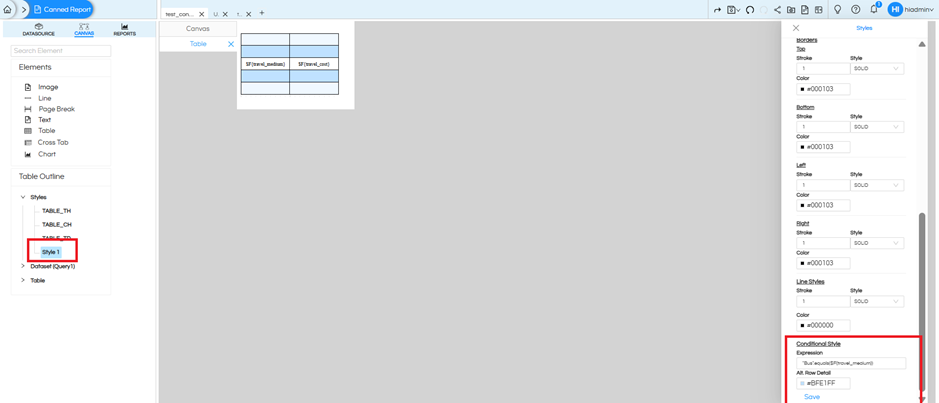
2. Configure the conditional style
Once the style is created, select the newly created style.
The Styles pane will appear on the right side. Scroll down to the Conditional Style section.
Enter the required Conditional Expression.
For example:
‘Bus’.equals($F{travel_medium})
This condition checks whether the travel_medium field contains the value Bus.
Then, under Alt. Row Detail, select the background color you want to apply when the condition is satisfied.
Finally, click Save.
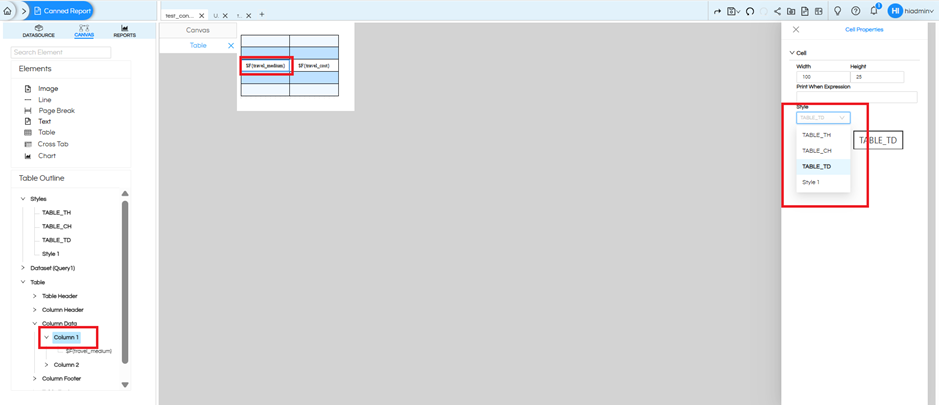
3. Select the column/cell where the conditional formatting should be applied
Under Table, select the required column/cell on which you want to apply the conditional style.
The Cell Properties pane will appear on the right.
Select the style created earlier
In Cell Properties → Style, select the custom style that you created in Step 1.
For example:
Style → Style 1
The conditional formatting will now be applied to the selected column/cell based on the expression defined in the style.
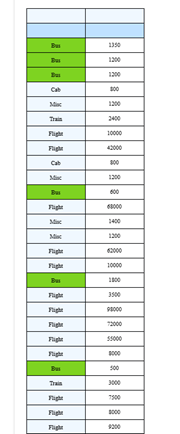
When the report is executed, the condition is evaluated for each row.
For example, if the condition is:
‘Bus’.equals($F{travel_medium})
the rows where travel_medium = Bus will be displayed with the selected background color, while the other values will retain the default formatting.
For Crosstab
The same approach can be used for a Crosstab component:
- Create a custom Style.
- Add the required Conditional Expression.
- Select the required alternate/background color.
- Save the style.
- Select the required Crosstab cell.
- Apply the created style from Cell Properties → Style.
This allows you to apply value-based conditional formatting to both Table and Crosstab components.
Thank You,
Helical Insight.
